Wednesday 29 March 2017

BANANA MOUSSE

BANANA MOUSSE 


Mousse is a French dessert, it is a sweet dish with Whipped Cream or Egg White base. It is stabilized with Gelatin and then chilled to make it set and firm in any mold, preferably a transparent one. It has a light airy texture due to air bubbles created during its preparation.  

Mousse can be sweet and savory, it can be very light and fluffy or some time thick and creamy as per its ingredients and technique. Very Popular in Europe. 

Chocolate Mousse is most sought-after dessert after dinner.  Different Fruit Mousses are also very nice in taste.

Mousse can be used as an airy Cake filling and in multi-layered cakes, one layer of Mouse is also used which give a very light and creamy touch to otherwise different taste and texture of the Cake.

Savory Mousse is made from Meat, Fish, Cheese, and Vegetables.  I could be used as Hot and Chilled. Savory Mousses are mostly served hot.

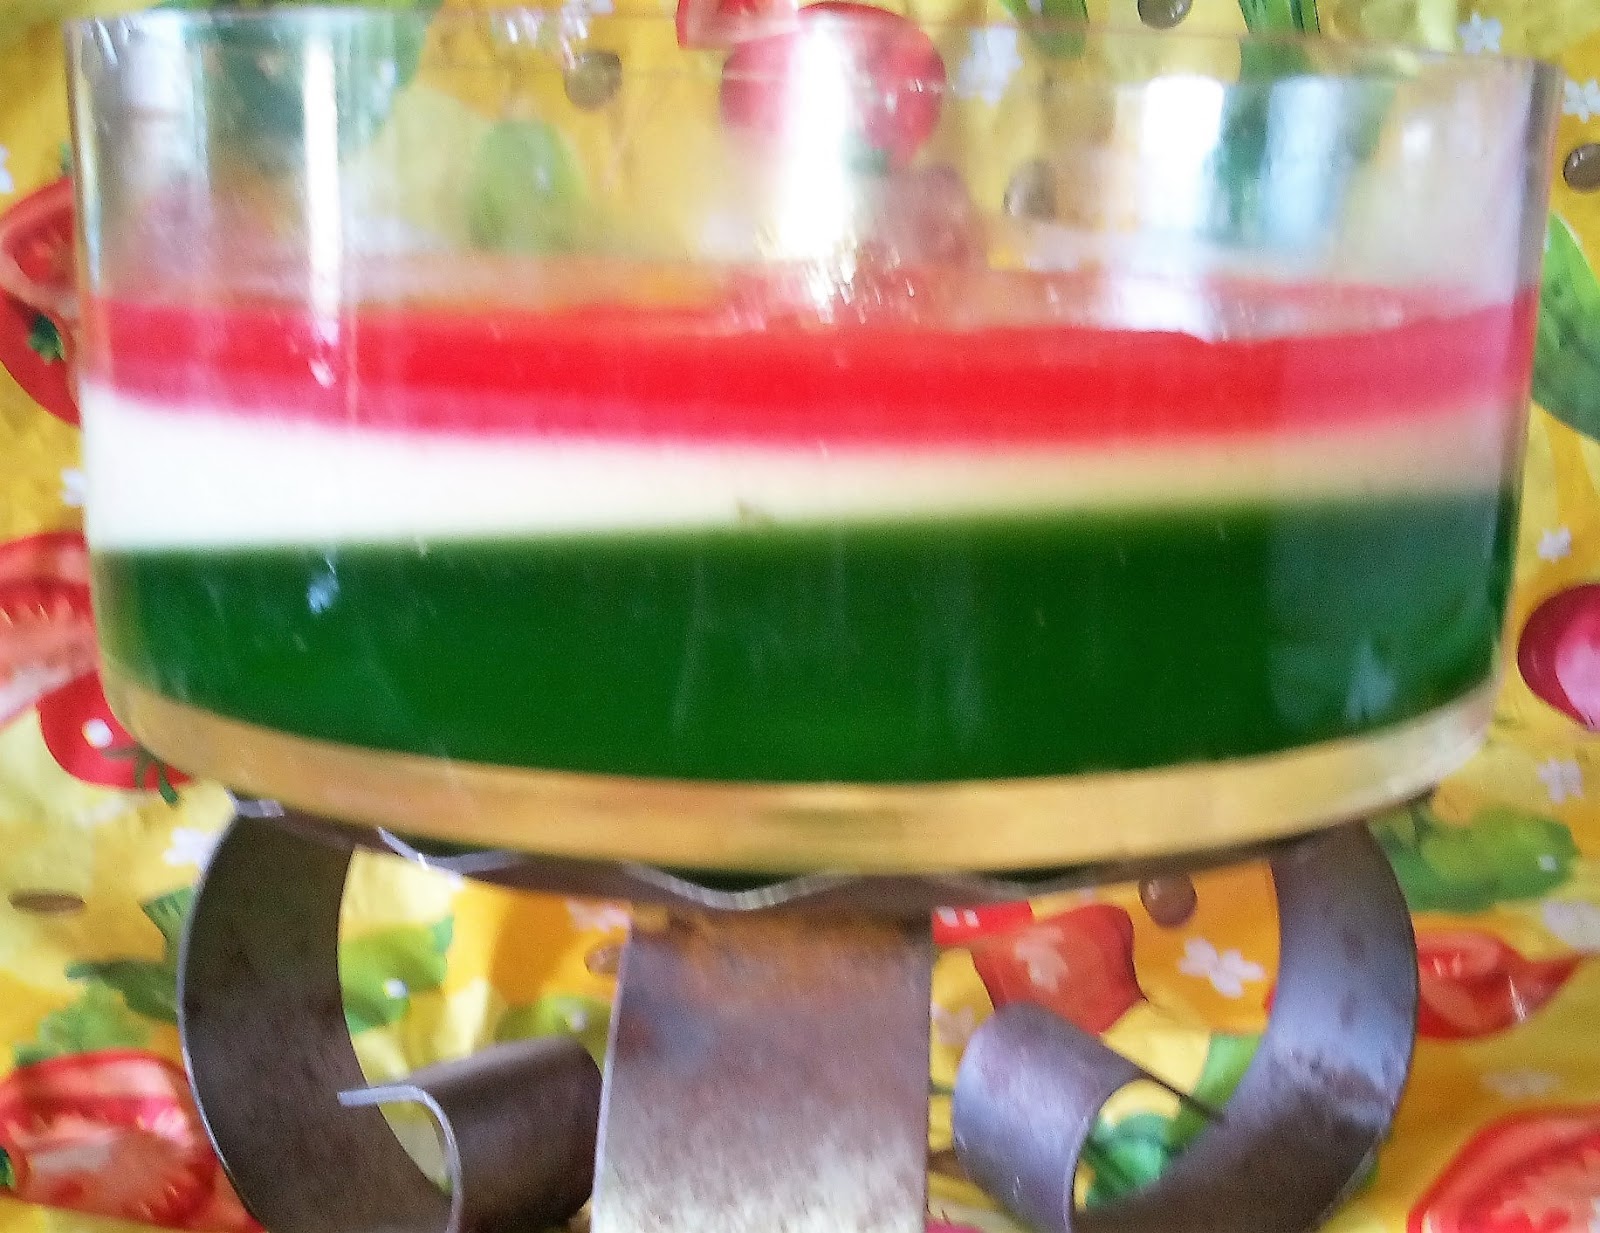
I am preparing Banana Mouse for you with 2 layers of Jelly of different flavors. Jelly is in added item for giving it a colorful look and taste.  I used 3 Jelly flavors, Banana, Strawberry, and Blueberry, it is up to you to decide which flavor yu are going to use.  Only one Jelly could also make it great.


WHAT WE REQUIRE:
  1. 15 Ripe Bananas
  2. 300 ml Fresh Cream (1-1/2 Packets)
  3. 3/4 Cup Sugar
  4. 3 Egg Whites
  5. 2 Packets Strawberry Jelly Crystals
  6. 2 Packets Banana Jelly Crystals
  7. 2 Packets Blue Berry Jelly Crystals ( Flavors of your choice may vary)
  8. 3 Tablespoons Gelatin Powder

HOW WE MAKE OUR MOUSSE:

  1. Boil Banana Jelly Crystals and set them in preferably transparent bowls, Cups or whatever you like.
  2. Put the bowls/cups in the Refrigerator until the Jelly is firm.
  3. Mash the Bananas into a fine paste.
  4. Start preparing Banana Mouse by mixing Gelatin Powder in hot water.
  5. Take Egg whites and blend them in a Blender until frothy and in a state that when you turn the Blender upside down, the mixture must not fell out of it.
  6. Add sugar and Gelatin mixture and blend until fully combined.
  7. Add fresh cream and Banana paste.
  8. When everything is combined, pour the mixture over the Jelly at your desired level and then again refrigerate.
  9. Check out the level of firmness of Banana mixture and if you found it is well set then pour another Jelly flavor over it and again put it in the Refrigerator.
  10. Now our Banana Mousse has three colors and it looks great.
  11. Serve chilled.

We have prepared our Banana Mouse with three colors and three different flavors today which is our first step in making Mousse. There are a lot of different methods and ingredients for preparing the Mouse which would be placed in this Blog soon.  I chose this one because of it is very simple and easy to make it. 


Hope you'll throw away FEAR OF FAILURE now.


InshaALLAH our next recipe will be BUTTERFLY SHAPED BASIC SPONGE CAKE


Thanks,


NOVICE

Saturday 25 March 2017

GARLIC BREAD


LAHSAN KI DOUBLE ROTI SIMPLE AND EASY


Garlic Bread and Pizza have quite a common history that dates back as far as 500 BC  and may be much earlier. Soldiers at that time used their shields as baking pans or hot plates for preparing their bread (Roti) and somehow they covered it with butter, fat or cheese and then some garlic rub.

There is another narrative about the earlier use of Garlic in bread, according to that it is originated in South of Europe where Garlic Plants were in abundance. Because of this, Garlic was used in food in many ways and one of them is this Garlic Bread. Present day Garlic bread is an offshoot of famous Italian Bruschetta which was and still is browned on both sides on hot coals.This Bread was coated liberally with Olive oil. Rubbing the top with Garlic was optional.

Garlic Bread was introduced in the US by the Italian and Mediterranean immigrants and it is popular till date.

Garlic Bread can be made in various styles and kinds, like Crispy, Soft, Herbed and Cheesy It is different in different cultures and countries.
Garlic Bread made with the French Baguette, it tastes great because of its thick crust and also tends to stay frozen much longer.

It is very easy to make and there are no elaborate arrangements for its preparation. 


Let us start preparing our Aromatic and very simple Garlic Bread with the name of ALLAH.


THINGS WE NEED:

  1. 2 Cups All-purpose Flour
  2. 2 tablespoons Yeast
  3. 2 Tablespoons Caster Sugar
  4. 2 Tablespoons Oil
  5. 2 Tablespoons Butter for Brushing.
  6. 2 Tablespoons Milk or Water.
  7. 1 Teaspoon Salt or according to your taste
  8. 1 Beaten Egg for Brushing
  9. 8-10 Cloves of finely chopped Garlic


HOW WE ARE GOING TO PREPARE:

  • Mix all the ingredients and half of the finely chopped Garlic except beaten egg and butter in the flour. 
  • Mix it thoroughly and knead with the help of Milk or Water and make a dough.
  • Cover it with a moist cloth and leave it to rise at room temperature. 
  • If it is very cold season then store the dough in a warm place, In a Microwave in off position.
  • The dough will rise and will be doubled in size.
  • When it is doubled in size take it out and shape it as you like or place it in the middle of a Loaf Pan. Remember, the dough size in the loaf must not touch its sides as it will rise when being baked and a full-size dough will go out of proportions and the Pan. It will also look very ugly.
  • Brush the top with beaten egg.
  • Place the Pan/dish in the pre heated oven at 180 C and bake for 15 minutes.
  • Take it out after the top is golden, make small cuts on the top and apply butter with a brush over it and sprinkle remaining finely chopped garlic all around.
  • Put it back in the oven for further 5-6 minutes.
  • When the sprinkled garlic turns golden, take the bread out and enjoy when it is cool enough to be eaten.


Overcome your FEAR OF FAILURE


INSHAALLAH my next recipe will be DOUBLE JELLY BANANA MOUSSE


Thanks,


NOVICE


Tuesday 21 March 2017

SWEET N SALTY ZEERA (CUMIN SEED) BISCUITS

Zeera Biscuits


These Zeera Biscuits are a nice variety in the family of biscuits. Its sweet and salty at the same time with the flavor and aroma of Zeera (Cumin seed)
Zeera also makes it good for digestion and a treat to have them with evening tea.
Baking biscuits is not a difficult task, very easy to make and bake.

I am starting with this Biscuit because I think there is nothing special or difficult to achieve. Making Zeera Biscuit may be taken as starting point for baking biscuits and cookies. It has the basic ingredients and the only thing which make it different is Zeera (Cumin Seed), take it out and lessen the quantity of salt it will become simple Vanilla biscuit with the addition of Vanilla extract.

Though normally Vanilla is added in Zeera biscuits, I want to enjoy the aroma and flavor of Zeera and Zeera only, that is why I've discarded Vanilla because Vanilla has overpowering smell or aroma. It would have made Zeera flavor less likely to be felt.

Now let us start making Zeera Biscuits with the name of ALLAH.


WHAT WE NEED:


  1. 2 Cups minus 2 Tablespoon all-purpose flour
  2. 2 Tablespoons Corn Flour
  3. 3/4 Cup Butter or Oil
  4. 1 Cup Sugar
  5. 1 Egg
  6. 2-3 Tablespoons Milk
  7. 1 Teaspoon Baking Powder
  8. 1/2 Teaspoon Baking Soda
  9. 1-1/2 Teaspoon Salt
  10. 1 Egg White
  11. 1 Tablespoon Roasted Cumin Seeds

HOW WE DO:


  • Sift and whisk all dry ingredients together in a bowl (except Cumin seeds)
  • Now add Cumin seeds in it and whisk them together.
  • In another bowl beat sugar and butter till creamy.
  • If using oil don't put all of it at once, keep some for mixing if needed when kneading so that it may not become oily.
  • Add more oil if it is hard and have cracks.
  • Now add dry mixture and make a soft dough.
  • The dough should leave the bowl clean.
  • Milk could be added to soften the dough but only a tablespoon at a time.
  • Cover the dough with plastic wrap and refrigerate it for one hour.
  • Roll the dough by sprinkling dry flour on the counter surface and roll it 1/2 inch thick.
  • Cut the biscuits with Biscuit Cutter or any utensil of any shape like a cup or glass.
  • Grease the baking tray and place the biscuits at least one inch apart.
  • Put the tray in pre-heated Oven at 180 C and bake for 10-12 minutes.
  • The sides of biscuits will turn Golden Brown means the biscuits are ready to be taken out, center or top will look softer.
  • Cool them on a cooling rack for few minutes and enjoy the sweet and savory Zeera flavor.
  • Store in an air tight jar. 

Our Zeera Biscuits are ready to be tasted now.


Enjoy,

Bake with NO FEAR OF FAILURE


INSHAALLAH the next recipe will be GARLIC BREAD 


Thanks,


NOVICE

Monday 20 March 2017

APPLE BROWN BETTY

APPLE BROWN BETTY FOR BAKING BEGINNERS.


Apple Brown Betty is one of the easiest baking dishes to satisfy your sweet tooth. It may be termed as a version of Crisp or Cobbler.  You only need to buy fruit from the market as all other ingredients it needs are commonly available in every household.

Apple Brown Betty is traditional American dessert made from fruit (Apple is used mostly for Brown Betty), crumbs or with all-purpose flour as is used in preparing Cobbler or Crisps. 

The fruit is baked with layers of broken bread slices, bread crumbs or even flour batter. Brown Sugar and Butter are other ingredients with a little milk or water as well. Nothing special is needed.

I have made this dessert without any milk or water and have used broken bread slices as its base to make it more easy and simple for baking beginners. 

As for its history is concerned, this dessert was first mentioned in print in 1864. In 1877 one recipe of this dessert shows apple sauce and cracker crumbs in it.

Unfortunately, nothing is found about the reason and background for the name Brown Betty.


Here we are to start preparing simple and easy Apple Brown Betty, I have created especially for beginners who are interested in baking with the name of ALLAH.


Things you need:

  • 4 Medium Apples (peeled, cored and sliced), I have sliced apples in Donut shape but one can slice them in any shape.  The shape is important for presentation only.
  • 1 teaspoon Darchini (Cinnamon) Powder.
  • 6-7 Large Bread Slices, cut in small cubes or coarsely shredded.
  • 1/2 Cup normal Butter
  • 1-1/2 Cups Brown Sugar (Packed) brown sugar make this dessert brown, but if brown sugar is not available at home, no problem in using normal white granulated sugar because we are not presenting our dessert for any competition.
  • 4 Tablespoons Milk or water.
  • 1/2 Teaspoon of Apple Essence (Optional) because Apples usually have their own powering aroma.
  • Silver Foil for packing the pan.

  •  

How we prepare our Betty:

  • Prepare a 9" Loaf tin or any Glass bowl preferably Pyrex. If both are not available, use any Oven dish with at least 4 inches deep by greasing with oil or butter and applying butter paper in its bottom and side walls as well.
  • Peel, core and slice apples in any shape you feel easy.
  • Slice bread into small cubes or merely shred them and place them in the bottom of the dish.
  • put some soft butter over the bread and then some brown sugar or plain sugar all over the slices.
  • Now arrange slices of apples over the sugar and repeat this process twice more, making 3 layers.
  • put all the remaining butter on top.
  • If you want the dish softer then sprinkle milk or water over it before putting butter on top but if you want it crispy then leave Milk or Water.
  • Pack the dish with Silver Foil so it may not burn on top.
  • Preheat Oven on 180 C for 20-30 minutes and then place the pan in it.
  • After 40-45 minutes peel off the foil and bake it for 5-6 minutes more so that the top turns golden.
  • Remove from Oven and remove the foil as well and cool it for 15 minutes on Cooling rack.
  • Place a flat bottom plate on top of the pan and invert it or take it out by first moving a knife all around and then with the help of overhanging butter paper on the serving dish and enjoy with friends and family.


REMEMBER, THERE IS NO FEAR OF FAILURE.


INSHAALLAH my next post will be Sweet n Salty Zeera Biscuits (Cumin Seed Biscuits)


Thanks,


NOVICE

Saturday 18 March 2017

GULAB JAMAN


GULAB JAMAN 


Gulab Jamun is a KHOYA (Milk Solid) based sweet dish, very very popular in sub-continent and surrounding countries. It is an all seasons sweet but consumed more during festivals. Gulab Jamun is popular also in some Caribbean countries specially where Indian settlers are found.

Khoya or Milk Solid is made by heating Milk in big Cauldrons on low heat to evaporate its liquids until it turns into a paste form. After cooling its kneaded to form a dough.

Khoya is used as a base in almost all the sweet dishes (Mithaies) in Pakistan and India as well as other countries. I can be eaten raw.

The delicacy and aroma of Rose make this dish mouth watering. After frying the balls of Gulab Jamun, they are dipped in Rose flavoured sugar syrup and they remain in that syrup for longer periods. They are soaked in the syrup and become more tender to eat without using teeth.  Gulab Jamun can be eaten with lips and tongue only.

Khoya (Milk Solid) is made in two different forms or styles, one is called Lassa Khoya and the other is (Granulated) Danedar Khoya. The Sweets (Mithai) is mostly prepared with Lassa Khoya, it is tender, soft and silky in texture and ideal for Gulab jamun.  Granulated Khoya is mostly used in preparing different types of Halwa.

Gulab Jamun is also prepared by Dry Milk which makes it more cheaper.

Here I am giving the recipe of Gulab Jamun made with Lassa Khoya and hopefully very soon I'll post Gulab Jamun of Dried Milk.

Gulab Jamun has another variety which is called Kala (Black) Gulab Jamun. It is darker in colour and a little harder than the Golden colour normal Gulab Jamun.  It is made by mixing a little sugar in the khoya dough.

Gulab Jamun is also made from Bread Slices, which is very simple and easy but the Great taste of traditional Khoya made Gulab Jamun has no parrallel.


Okey so here we start preparing Gulab Jamun by the name of ALLAH.


THINGS WE SHALL NEED :

For Gulab Jamun Balls:


  1. 1/2 Kg Lassa Khoya
  2. 1 Egg beaten
  3. 2 Tablespoon All Purpose Flour
  4. 1/2 Teaspoon Cardamom Powder
  5. 1/2 Teaspoon Backing Soda


For Sugar Syrup :

  1. 2-1/2 Cups Sugar
  2. 1-1/2 Cups Water
  3. 1 Teaspoon Rose Extract or Kewra (Screw pine essence)


HOW WE DO IT :

  1. Knead the Khoya with hands for 2-3 minutes to make it more softer.
  2. Start mixing beaten egg very little at a time and continue kneading.
  3. The Dough should be soft and not cracking, add a little more egg if you feel it hard and cracking.
  4. Add all purpose flour and Cardamom Powder. Make sure the dough is not sticky and it leaves and cleans the bowl.
  5. Now make small balls from the dough with your hands and again check if there are any cracks in the balls. If there are, add a little more beaten egg and knead again.
  6. Put the balls aside and start making Sugar Syrup now.
  7. In a deep sauce pan put sugar and water and let it simmer till the sugar is completely dissolved.
  8. Add Rose Extract or Kewra and turn the heat to the minimum.
  9. Heat oil in a deep woke and when it feels hot enough, turn the flame to off and put a single ball in it. If you see tiny bubbles around the ball, that means the oil is correctly heated.
  10. put all the balls in the oil, In a few seconds they'll come up on the surface of the oil.
  11. Put the flame on medium low heat, and start frying the balls till they turn golden.
  12. Don't touch the balls with the spoon etc, just roll the Oil with spoon or spatula around the balls so they start moving in circles in the oil.
  13. Dousing the flame while putting in the balls in oil will save the balls from burning.
  14. Now take out the balls of Gulab Jamun from the oil and put them in the sugar syrup.
  15. Remember while removing the balls from oil you must not douse the flame until all the balls are taken out.
  16. Place the lid on the pan of sugar syrup for about 30 minutes and then remove one by one to any serving dish.
  17. Pour remaining syrup on them and sprinkle some Pistachio flakes and Rose petals.
  18. Enjoy the Sweetest and the tenderest Jamun while they are still hot. That will enhance its taste and you'll feel they are dissolving in your mouth without any effort.


Prepare Great Gulab Jamun without FEAR OF FAILURE.

Note: 
Please bear with me for any flaws, pictures of all the dishes are taken by me with Mobile phone. I dont have any facility of sophisticated Photographic equipment and I have no Modern Kitchen available with me. All I do is with the humble facilities of a humble home.


INSHALLAH our next recipe will be APPLE BROWN BETTY


Thanks,


NOVICE

Friday 17 March 2017

HOT N SPICY HOMEMADE PIZZA SAUCE

Hot n Spicy Homemade Pizza Sauce (Desi Style)


An essential part of Pizza preparation without which the Pizza can not be imagined.
Tomato is the main ingredient of this sauce. It is prepared all over the world with some variations in ingredients or their quantity but the base is same and that is Tomato.

I am giving you the version which is used in my home, made by my wife and liked and loved by my kids, guests or relatives if they get a chance to taste a Pizza at our home. This is because my kids are mad about pizza eating and seldom is a chance of some Pizza left for others.

I will also post the recipe for the Original or European style Pizza Sauce soon.

So let us start preparing the Pizza Sauce with the name of ALLAH.


Things we need:


  1. 1/2 kg Red Tomatoes Chopped
  2. 2 Tablespoon Oil
  3. 2 Tablespoon White Vinegar
  4. 1 Medium Onion diced
  5. 4 cloves of Garlic Chopped
  6. 6-8 Black Peppercorns
  7. 1 Bay Leaf
  8. 1 Tablespoon Red Chili Flakes
  9. 1 Teaspoon Ajwain
  10. Salt to taste
  11. 1/2 Cup Tomato Ketchup
  12. 1 Tablespoon Cumin Seeds
Place all the above ingredients at your Kitchen table, all these are a routine part of every household.

How we prepare it:

  1. Heat oil in a medium saucepan and put diced onion and Garlic till the Onion becomes translucent.
  2. Put all the ingredients in the Pan except Tomato Ketchup and Vinegar. 
  3. Cook on medium heat until the tomatoes are tender.
  4. Douse the heat and let it cool for 5 minutes.
  5. Put this coarse paste in a Blender and add Tomato Ketchup and Vinegar. Blend it well.
  6. The paste will look creamy with the great Aroma of Bay Leaf.
  7. Cook this creamy paste on low heat for 3-4 minutes again.
  8. Our Desi Style Pizza Sauce is ready to be applied on Pizza now.


Enjoy without FEAR OF FAILURE


INSHAALLAH the Sweetest and mouth watering  GULAB JAMUN will be my next post. 


Thanks,


NOVICE

Tuesday 14 March 2017

HOMEMADE CHAT MASALA


HOMEMADE SPICY CHAT MASALA


Chat Masala is the mixture of some hot and tangy spices. Chat is Urdu and Hindi word, means to lick and Masala means spice. It has a sour and tangy taste with dried green mango powder and citric acid in it.

Chat Masala normally used for enhancing flavor and taste of different dishes, like Chickpea Salad, Dahi Baray, mix fruit salad and so on and so on.

Start preparing your own Chat Masala with the name of ALLAH.


WHAT YOU NEED:

  1.  4 Tablespoon Coriander Seeds (Sabut Dhaniya)
  2.  2 Tablespoon Cumin Seeds (Sabut Zeera)
  3.  1 Tablespoon Carom Seeds (Ajwain)
  4.  5-6 Red Button Chilies (Gol Lal Mirch)
  5.  3 Tablespoon Black Salt (Kala Namak)
  6.  2 Tablespoon Dried Green Mango Powder (Amchur)
  7.  1 Teaspoon All Spice Powder (Garam Masala)
  8.  1 Teaspoon Black Pepper (Kali Mirch)
  9.  1 Tablespoon Paprika Powder (Kashmiri Mirch or Red Capsicum) Bell Pepper
  10.  1 Teaspoon Citric Acid (Tatri)
  11.  1 Tablespoon Salt

HOW TO DO:

Roast the spices number 1,2 and 3 on a hot plate (Tawa) till its aroma fills the air. 

Grind all three and make a fine powder. Add all other spices with them and mix thoroughly.

Your Chat Masala is ready to be served with desired snacks/dishes.


Without any FEAR OF FAILURE. 

Thanks

NOVICE


HOMEMADE BIHARI MASALA


Homemade Bihari Masala (Bihari Spice)

Bihari Masala has a unique taste and is used in many meat dishes, its name attributed to Indian area of Bihar. It is very popular in Pakistan. Restaurants make many dishes with this spice i.e. Bihari Kabab, Bihari Boti, Bihari Qeema, Galawati Qeema etc.

Though it is available in every nook and corner. There is no guaranty of its quality, being prepared commercially has its own hazards.  So prepare it at home with different spices, mostly available in a common kitchen.

In my previous post of Galawati Qeema, I promised to post recipes of Bihari Masala as well as Chat Masala.

Here is how Bihari Masala is made, so start with the name of ALLAH.

THINGS YOU NEED:

  1.  2 Tablespoon Gram Flour
  2.  1 1/2 Tablespoon Salt
  3.  2 Tablespoon Kachri Powder (Meat Tenderiser)
  4.  1 1/2 Tablespoon Red Chili Powder
  5.  1 Tablespoon Paprika Powder
  6.  1 Tablespoon Cumin Seed Powder
  7.  1 Tablespoon Coriander Powder
  8.  1 Teaspoon Garam Masala (All Spice Powder)
  9.  1/2 Teaspoon Black Salt
  10.  1 Tablespoon Black Pepper Corn
  11.  1/2 Tablespoon Kabab Chini
  12.  1 Tablespoon Poppy Seeds

HOW YOU MAKE IT:

  1. Wash and rinse the Poppy Seeds and then grind them to powder form.
  2. Grind the Black Pepper Corn and Kabab Chini to a fine powder.
  3. Now mix all other ingredients with newly grounded and the famous Bihari Masala is ready.
  4. Store in an airtight Jar.
Remember there should be no FEAR OF FAILURE.

Thanks

NOVICE

Monday 13 March 2017

GALAWATI QEEMA


GALAWATI QEEMA

(TENDERISED BBQ BEEF MINCE)


Galawati Qeema or BBQ tenderised beef mince is one of the popular spicy dish of Pakistan.
Beef mince can be prepared in many ways and with many variations. It is mostly prepared during Eid ul Azha days and also a popular dish in wedding and engagement menus. This mince dish is used with PARATHA, a crispy and flaky round bread kneaded with Ghee and being fried in Ghee on a Hot Plate (Tawa) or even deep fried in a woke.


It is very easy while cooking, you only need proper spices.

Here is how I prepared this savory and spicy BBQ dish with the name of ALLAH.


Galawati Qeema

What you need :

  1.  1/2 Kg. Beef Mince                                      
  2.  1 Cup Oil                                                    
  3.  2 Tablespoon Raw Papaya Paste (Meat Tenderiser)                        
  4.  2-3 Tablespoon Lemon Juice                                     
  5.  2 Tablespoon Bihari Masalha                                  (I will post the recipe of                                                                                           Homemade Bihari Masala next)                                                                                                                                                                             
  6.  1 Tablespoon Red Chili Flakes                              
  7.  3-4 Chopped Green Chilies                       
  8.  15-16 Mint Leaves                                     
  9.  1 Teaspoon Cardamom Powder               
  10.  1 Teaspoon Garam Masalha (All Spice Powder)              
  11.  1 Tablespoon Poppy Seeds Grounded (KhashKhash)                 
  12.  1 tablespoon each of Ginger Garlic Paste                                 
  13.  1 Tablespoon Chat Masala                                           (Recipe will follow very soon)
  14.  2 Tablespoon White Vinegar                                         
  15.  Salt to taste                                                      
  16.  Piece of Coal for BBQ Flavouring                                       


Garnishing :

  1.  2 Lemons                                                    
  2.  4 Green Chilies (Cut in Half)                    
  3.  2 Tablespoon Ginger (Fine Julienne cut)                          
  4.  Onion Rings of One Onion                                          
  5.   2 Tomatos Cut in Rings                                            

How you do :

  1. Place mince in a large bowl and mix all the ingrediets except OIL and mix well.
  2. Cover the bowl and refrigertae Minimum ONE hour.
  3. After refrigeration, heat oil in a woke and put mince mixture and cook it on medium heat stirring ocassionally
  4. When the water dries up and oil is separated, turn heat to the lowest.
  5. Heat/burn a piece of Coal till it turns amber, place a piece of foil on the cooked mince and then place burning coal on this foil.
  6. Immediately sprinkle oil on the coal and cover the woke tightly.
  7. The burning coal will emit smoke which will give the mince required BBQ flavour.
Serve hot with Parathas after garnishing.


Cook  with NO FEAR OF FAILURE and Enjoy with guests.

Thanks

NOVICE